DIY Shower Upgrade With Waterproof Shower Wall Panels
Give Your Shower a DIY Upgrade with Waterproof Shower Wall Panels
Are you tired of your dull, worn-out shower? Do you dream of giving it a makeover but worry about the time, cost, and effort involved in a traditional tiling upgrade? Well, we’ve got fantastic news for you! At Wet Wall Works, we believe that everyone deserves a stylish shower without breaking the bank or their backs. That’s why we’re thrilled to introduce our Waterproof Shower Wall panels—the perfect solution for a DIY shower upgrade in Perth.
Why choose our wall panels, you ask? For starters, they’re incredibly cost-effective. There is no need to hire professional tilers or buy expensive grouting materials. With our panels, you can do it all yourself, saving a bundle in the process. Plus, they come in various designs and panel styles to suit every taste, from sleek and modern to classic and timeless. So, you can create a look that’s uniquely yours, all while staying within budget.
But that’s not all. Our wall panels are also super easy to install. If you’ve got a free weekend and a bit of DIY know-how, you can transform your shower in no time. And don’t worry—we’ll guide you through the whole process, from choosing the right panels to the actual installation.
Ready to Transform your Bathroom?
Discover the perfect wet wall panels for your bathroom renovation at Wet Wall Works. Shop now to explore our wide range of designs!
Intrigued? We bet you are! Stick around as we delve deeper into the benefits of a DIY shower upgrade with Wet Wall Works’ waterproof shower panels. Trust us, by the end of this article, you’ll be ready to roll up your sleeves and give your shower the makeover it deserves. Let’s get started, shall we?
The Basics: What Are Waterproof Shower Wall Panels?
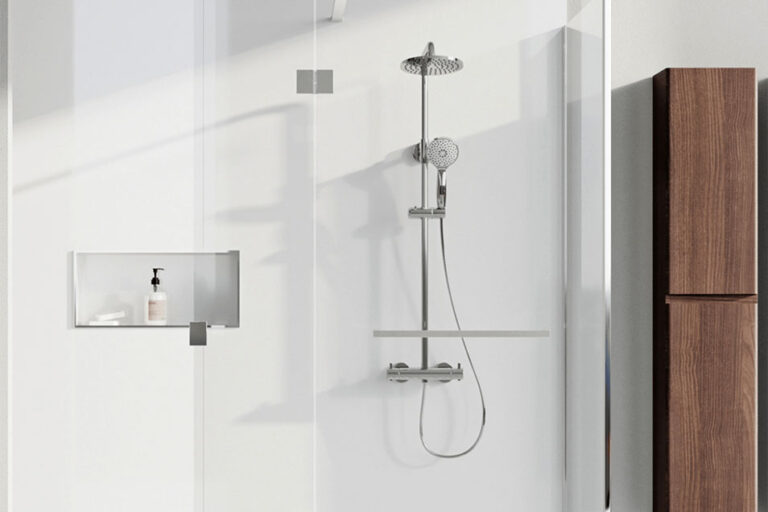
Have you ever wondered, “What exactly are waterproof shower wall panels?” Well, let us enlighten you. These panels are a modern, stylish, and cost-effective alternative to traditional tiles for bathroom or shower renovations. Made from PVC, they are designed to protect your shower walls from water damage and prevent mould growth, all while giving your bathroom an aesthetic upgrade.
Unlike tiles, our wall panels require no grout, so you won’t have to worry about water seepage or grout wearing out over time—a common problem with tiled showers. Starting at just $149 per panel, they’re an affordable option that delivers style and functionality without burning a hole in your pocket.
The Material Matters: What Makes Them Waterproof
So, what makes Wet Wall Works’ shower wall panels waterproof? It all boils down to the material. As mentioned, our panels are made of PVC, a type of plastic known for its water-resistant properties. This ensures that they are 100% waterproof and mould-resistant, providing a secure barrier against water damage.
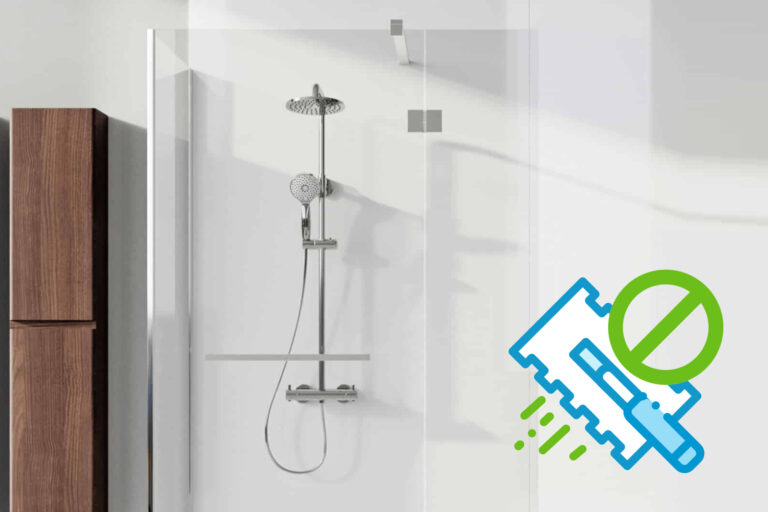
Moreover, our panels are also easy to clean. A simple wipe-down with a damp cloth is all it takes to keep them looking fresh and new. And with their durability and resistance to wear and tear, you can enjoy a beautiful, maintenance-free shower for years to come.
Why Upgrade Your Shower? The Transformational Power of a Shower Makeover
Let’s face it, bathroom renovations aren’t cheap. According to Houzz.com.au, a bathroom renovation can cost between $10,000 and $25,000. Which is why a mini bathroom upgrade in the form of a shower makeover is the perfect solution for those who want a change but don’t have the budget for a full bathroom renovation.
A shower makeover isn’t just about aesthetics; it’s also about improving functionality and increasing home value. With a DIY shower upgrade in Perth, you can transform your outdated shower into a spa-like retreat, boosting your home’s appeal and value in the process.
Imagine stepping into a sleek, modern shower every morning, complete with waterproof wall panels that reflect your personal style. Not only will it enhance your daily routine, but it can also be a big selling point if you decide to put your home on the market.
Quick and Affordable: The DIY Edge
When it comes to a DIY shower upgrade, speed and affordability are key. That’s where Wet Wall Works’ waterproof shower wall panels shine. As we’ve mentioned, our panels are easy to install—no special tools or expertise are needed. You can have your new shower up and running in a weekend, saving you both time and money.
What’s more, with our panels, you get the best of both worlds: quality and affordability. We’re proud to offer the lowest prices guaranteed without compromising safety or style. Whether you’re renovating your home or upgrading a commercial space, our panels are an innovative, cost-effective choice.
So why wait? Start your DIY shower upgrade today with Wet Wall Works, your trusted supplier of high-quality, waterproof shower wall panels in Australia.
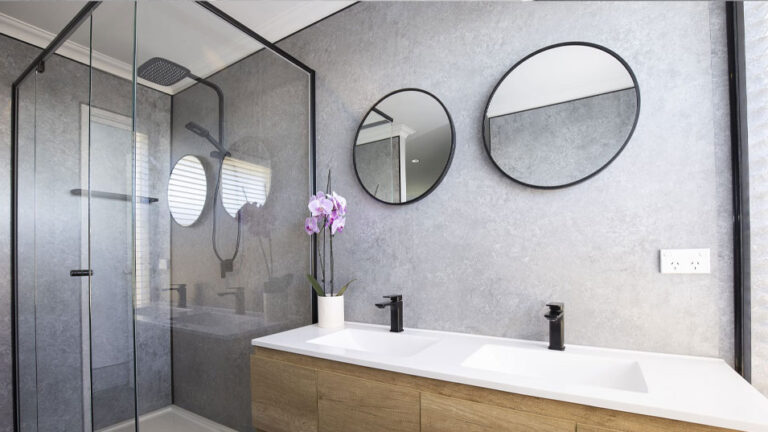
Design Options: Creating Your Own Shower Oasis
At Wet Wall Works, we understand that everyone has a unique taste when it comes to their home’s interior. That’s why we offer various design options for our waterproof shower wall panels, ensuring you can create your dream shower oasis.
Contemporary Chic: Modern Designs
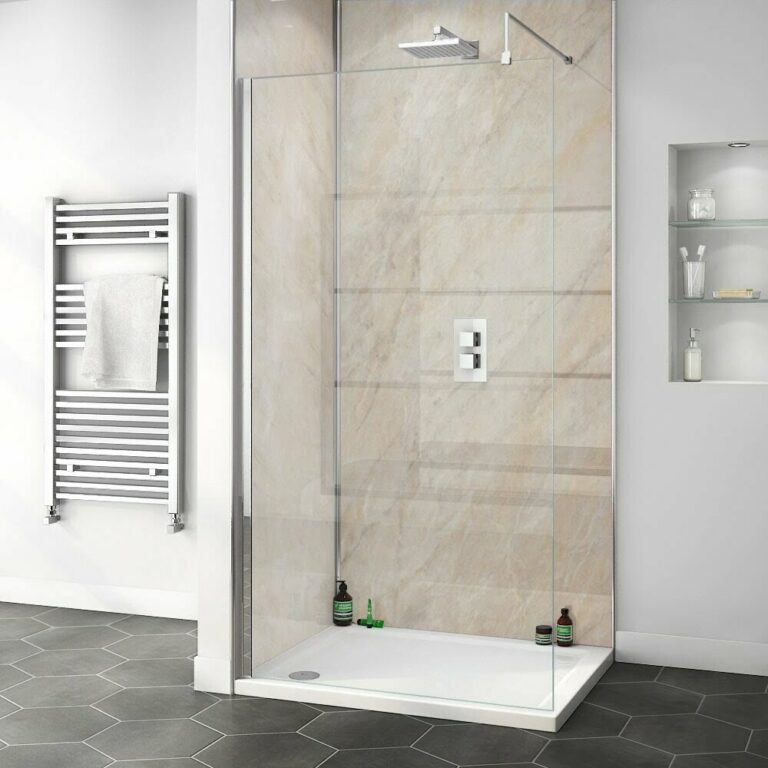
If you’re a fan of modern aesthetics, you’ll love our selection of contemporary designs. Our Concrete panel brings an urban flair to your bathroom, perfect for minimalist or industrial-themed spaces. For a more luxurious touch, consider our Black Sensation design, which exudes sophistication and modernity. Alternatively, the sleek Blanco and the calming Himalayan Marble designs offer a timeless yet modern look, suitable for any contemporary bathroom.
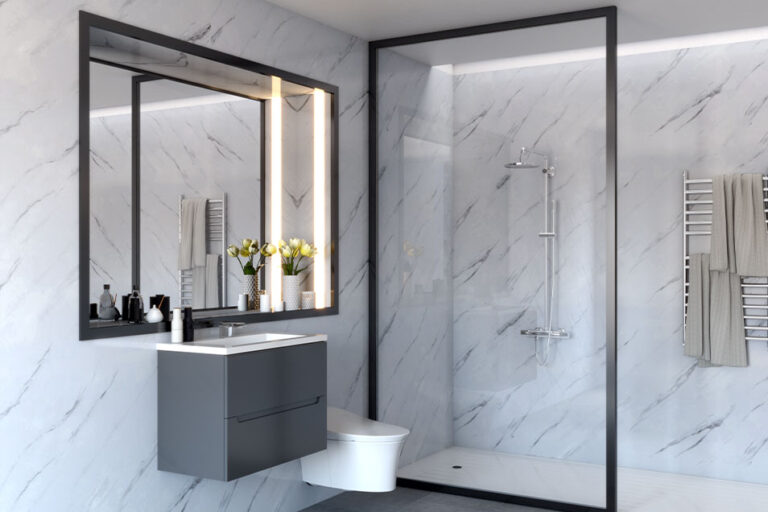
Timeless Elegance: Classic Designs
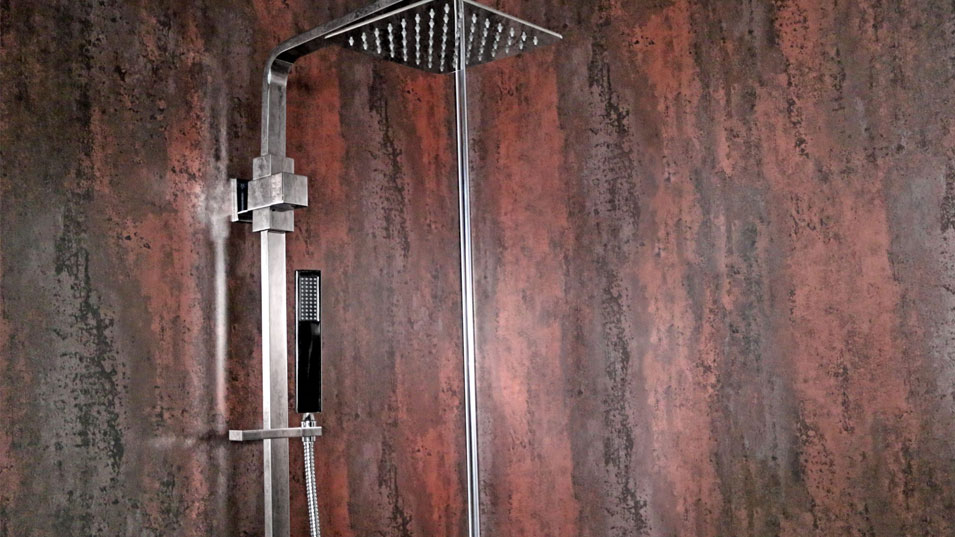
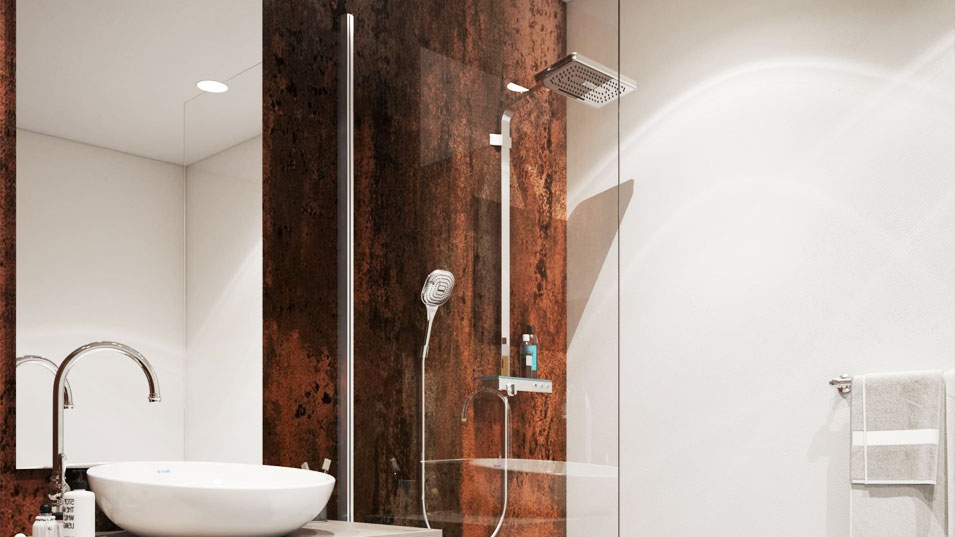
For those who appreciate the classics, we’ve got you covered, too. Our Carrara design offers a modern twist on the timeless marble look, ideal for creating an elegant atmosphere. The Sahara Gold Marble design adds a touch of traditional elegance, while the Subway Tile design offers a versatile look that never goes out of style. If you’re after a unique and impactful design, our new Lava design captures the essence of weathered steel, bringing a distinctive charm to your bathroom.
Looking to meet another design style? No worries, check out our post “From Classic to Contemporary: Matching Wall Panel Designs with Your Interior Style“ for more ideas.
Tailored to You: Customisable Options
One of the best things about our wall panels is their customisability. Whether you’re after the Italian luxury of our Graphite Marble design, the sophistication of our Gemstone design, or the classic elegance of our Calacatta design, we’ve got something to suit every taste. And with professional installation services available in Western Australia, you can rest assured that your DIY shower upgrade in Perth will be a breeze.
Remember, our wall panels are not only stylish but also practical. They’re made from cost-effective PVC, making them lightweight, easy to handle, and 100% waterproof. Plus, they’re mould-resistant and easy to clean—perfect for a low-maintenance yet high-impact shower upgrade.
So why wait? Start creating your dream shower oasis today with Wet Wall Works, Australia’s leading supplier of high-quality, affordable shower and wet wall panels.
The DIY Process: A Step-By-Step Guide
Embarking on a DIY shower upgrade in Perth might seem daunting, but we assure you, it’s simpler than you think. With Wet Wall Works’ waterproof shower panels, you’re already halfway there. Let’s walk you through the process step by step.
Tools You’ll Need
First things first, you’ll need to gather your tools. Here’s what you’ll need:
- A tape measure, for accurate measurements.
- A spirit level, to ensure your panels are perfectly vertical.
- A saw or jigsaw, to cut your panels to size.
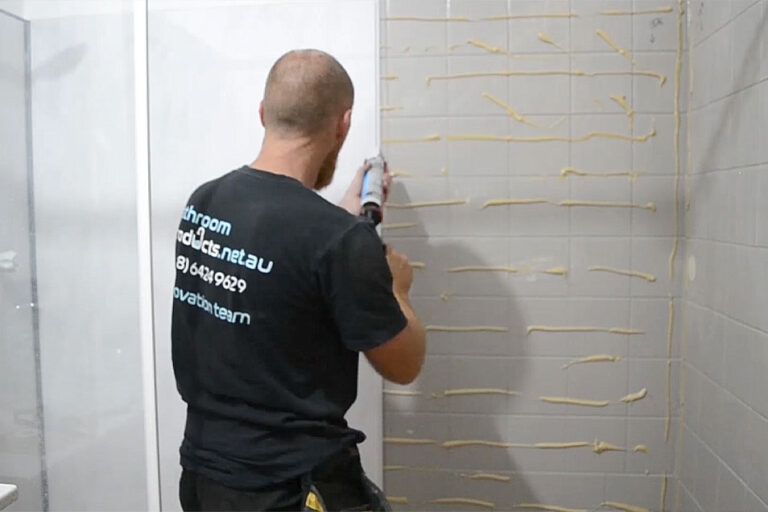
- Silicone sealant and a sealant gun, for waterproofing the edges of your panels.
- Adhesive, to secure your panels to the wall.
That’s it! No specialised tools or expertise required. Just some basic DIY equipment and a can-do attitude.
Preparing Your Shower Area
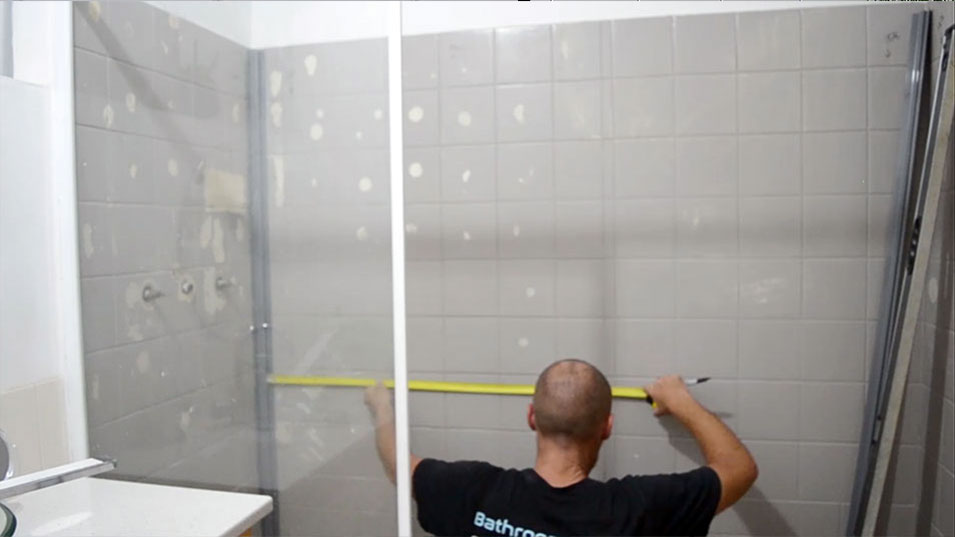
Next, you’ll need to prep your shower area. This involves removing any old tiles or wallpaper and ensuring the surface is clean, dry, and free of dust or debris. For the best results, we recommend using a mild detergent and warm water to clean the area thoroughly.
Once your walls are clean and dry, you’ll need to measure the area where you’ll be installing your panels. Be sure to take accurate measurements; this will ensure a perfect fit and a professional finish.
Installation: It’s Easier Than You Think!
Now comes the fun part—installation! Here’s a simplified guide to get you started:
- Apply adhesive to the back of your panel.
- Position your panel on the wall, using your spirit level to ensure it’s straight.
- Press firmly, allowing the adhesive to bond with the wall.
- Use your silicone sealant along the edges of your panel, creating a waterproof seal.
- Repeat the process with your remaining panels.
And voila! You’ve just completed a DIY shower upgrade using Wet Wall Works’ Waterproof Shower Wall Panels. It’s that easy! For more in-depth instructions, I highly recommend you read our post, ‘How to Install Waterproof Shower Wall Panels: A DIY Guide‘.
Remember, we’re always here to help. If you run into any issues or have any questions during your DIY project, don’t hesitate to contact us. At Wet Wall Works, we’re committed to making your DIY shower upgrade as smooth and enjoyable as possible. So why wait? Start your DIY journey today and transform your shower into a stylish oasis with our high-quality, affordable wall panels.