Navigating Wet Wall Panel Trims & Adhesives: A Comprehensive Guide
When it comes to installing wet wall panels, it’s not just the panels themselves that matter, but also the finer details that accompany them—namely, wet wall panel trims, panel adhesives and silicones. These elements are crucial in ensuring a seamless finish and long-lasting durability, transforming your space into one that’s not only beautiful but also stands the test of time.
Whether you’re a homeowner looking to give your bathroom a facelift, a DIY enthusiast eager to tackle your next project, or a professional renovator aiming for perfection, understanding the role of trims and adhesives is key.
In this comprehensive guide, we’ll explore the different types of finishing trims, such as Internal Corner Trim, External Corner Trim, Panel End Cap, and H Trim, alongside top-notch adhesives like Crommelin® Hybrid MS Polyurethane Adhesive and Crommelin® Silicone WP Plus. Get ready to arm yourself with the knowledge necessary for a flawless and lasting DIY installation, ensuring both aesthetic harmony and structural integrity in your bathroom renovations.
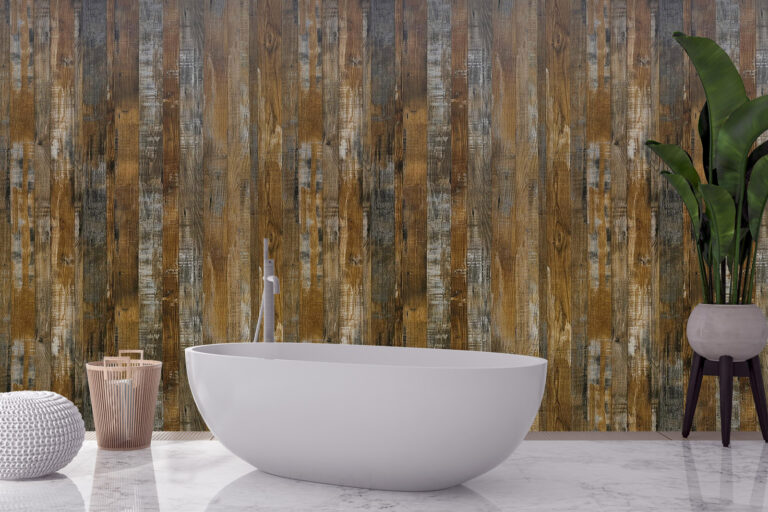
Ready to Transform your Bathroom?
Discover the perfect wet wall panels for your bathroom renovation at Wet Wall Works. Shop now to explore our wide range of designs!
Key Takeaways
- Wet wall panel trims and adhesives are essential for ensuring a seamless finish and durability in bathroom renovations.
- Trims play a dual role in enhancing aesthetic appeal and protecting the edges and corners of the panels from moisture and wear.
- There are four main types of trims: Internal Corner Trim, External Corner Trim, Panel End Cap, and H Trim, each designed for specific applications in the installation process.
- Choosing the right colour and profile for trims can significantly impact the bathroom’s overall look, with options available to match or contrast with panel designs.
- Crommelin® Hybrid MS Polyurethane Adhesive and Crommelin® Silicone WP Plus are recommended for their strength, flexibility, and waterproof properties, ensuring long-term durability and performance.
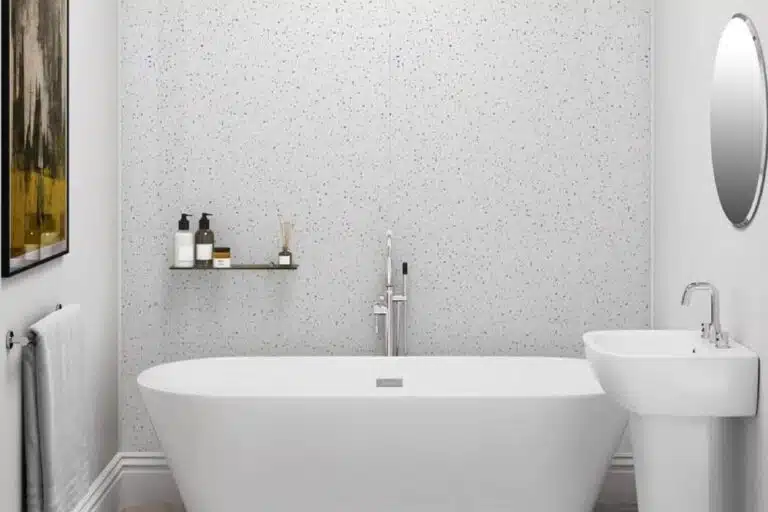
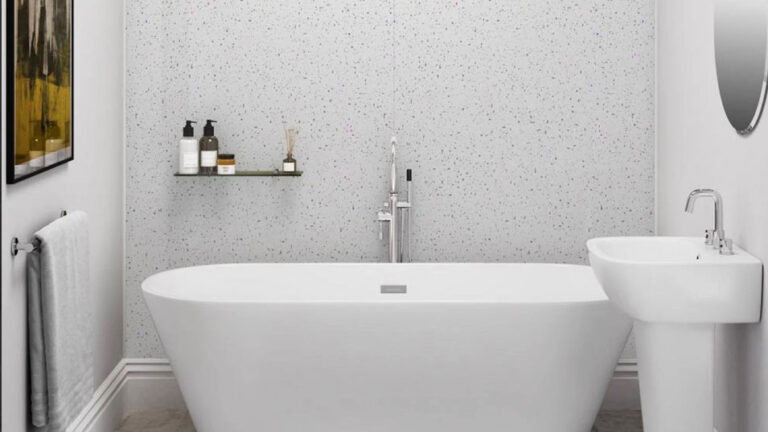
Understanding Wet Wall Panel Finishing Trims
At Wet Wall Works, we understand that the devil is in the details—especially when it comes to renovating your space. That’s why our PVC wet wall panel trims are not just an afterthought; they’re a crucial part of ensuring your wall panels not only look fantastic but also stand up to the test of time. These clever little components play a dual role: they enhance the aesthetic appeal of your walls by providing a neat, cohesive look, and they add to the structural integrity by protecting the edges and corners of the panels from moisture and wear.
Imagine stepping into a freshly renovated bathroom or shower—the smooth, sleek lines, the seamless joints, and the overall polished finish. That’s the magic wet wall panel trims bring to the table. Let’s dive into the types of trims and their applications, ensuring you’re equipped with the knowledge to make your project a stunning success.
Types of Trims and Their Applications
The key to a flawless DIY wet wall panel installation lies in choosing the right finishing trims for their designated areas and using them correctly during installation. Here are the four main types of trims you need to know:
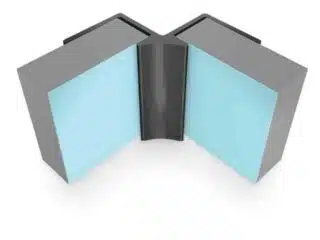
Internal Corner Trim: Picture the inside corners of your room. These are spots where two panels meet in a snug fit. The internal corner trim is your best mate here, designed to nestle right into these joints, ensuring a tidy and waterproof seal. It’s like giving your walls a tight, reassuring hug, making sure everything stays perfectly in place. When installing, ensure the trim is cut to the exact height of your room for a clean, uninterrupted line.
External Corner Trim: Now, let’s talk about external corners—these are the outward-facing corners of your room. They’re a bit like the elbows of your space; they need protection and a bit of polish. External corner trims are crafted to wrap around these corners, protecting them from knocks and bumps while providing a sleek, finished look. For the best results, measure twice and cut once, ensuring the trim fits like a glove.
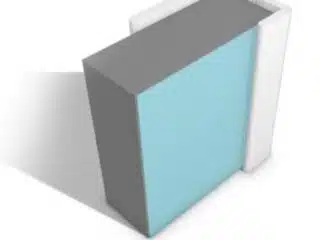
Panel End Cap: The panel end caps are the unsung heroes of the trim world. They’re used to cap off the raw edges of your panels, giving your installation a professional, finished appearance. It’s like neatly tucking in the edges of your bed—everything looks cleaner and more put-together. Slide the end caps onto the edges of your panels before mounting them to the wall for a flawless finish.
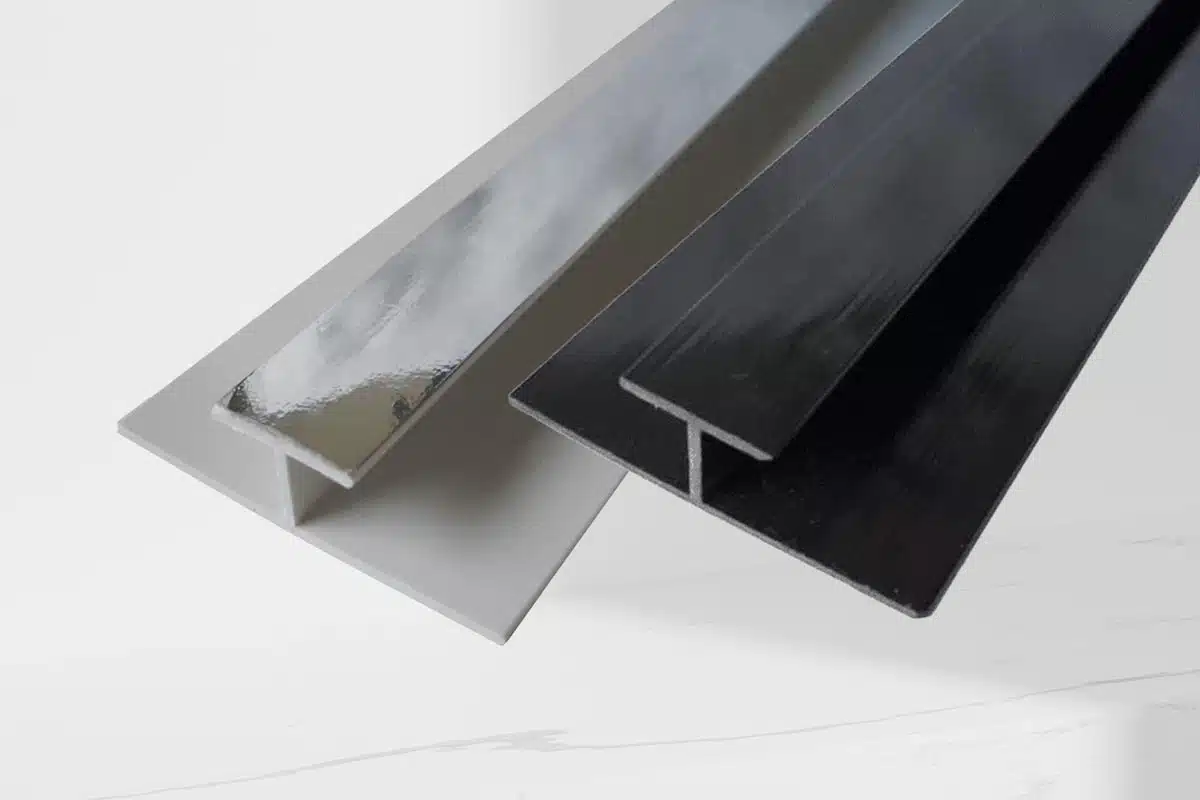
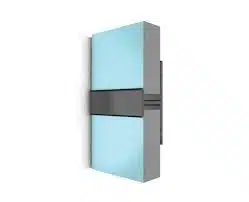
H Trim: Ever wonder how to get two panels to sit side by side so seamlessly that it looks like one continuous surface? Enter the H Trim. This handy little accessory is designed to join two panels together, side by side, without any visible gaps or lines. It’s like a secret handshake between panels, bringing them together in perfect harmony. Ensure the panels are level and aligned before slotting them into the H Trim for a smooth, unified look.

Internal Trim External Corner Trim End Cap Trim 
H Trim

Design Considerations for Trims
When it comes to giving your bathroom a stunning makeover with wet wall panels, the devil truly is in the details. Selecting the right trims is not just about functionality; it’s also about making a style statement. At Wet Wall Works, we understand how vital these finishing touches are. Let’s dive into how you can match trim colours and profiles to complement your bathroom’s aesthetic beautifully.
Matching Trim colours to Panel Designs
Choosing the right colour for your wet wall panel trims can dramatically enhance the overall look of your bathroom. With options like classic black, crisp white, sleek grey, sophisticated chrome, and warm sand, the possibilities are endless. But how do you decide?
Consider both contrast and harmony. A black or chrome trim can offer a striking contrast against lighter panels, perfect for a modern, edgy look. On the other hand, white or sand trims can blend seamlessly with softer panel designs, creating a serene, cohesive space. Grey trims work wonderfully as a versatile choice, harmonising with a wide range of panel colours for those looking for a balance between contrast and uniformity.
Want to learn more about trims and pairing them with panel designs? Read our article, ‘Wet Wall Panel Trims: The Key to a Polished Bathroom Look‘.
Choosing Trim Profiles
The profile of your trim also plays a crucial role in defining the bathroom’s character. Slim, minimalistic trims can enhance a modern, sleek look, while more detailed profiles may complement traditional or elaborate bathroom styles. When selecting trim profiles, consider the overall aesthetic you’re aiming for. Is it contemporary chic or classic elegance? The right profile can tie the room together, making your design choices feel intentional and well-coordinated.
Choosing the Right Adhesives for Wet Wall Panels
Ensuring your wet wall panels are securely affixed and moisture-resistant is paramount, and that’s where choosing the right adhesive comes into play. The longevity and durability of your panels largely depend on the adhesive used, making this decision just as important as selecting the panels themselves.
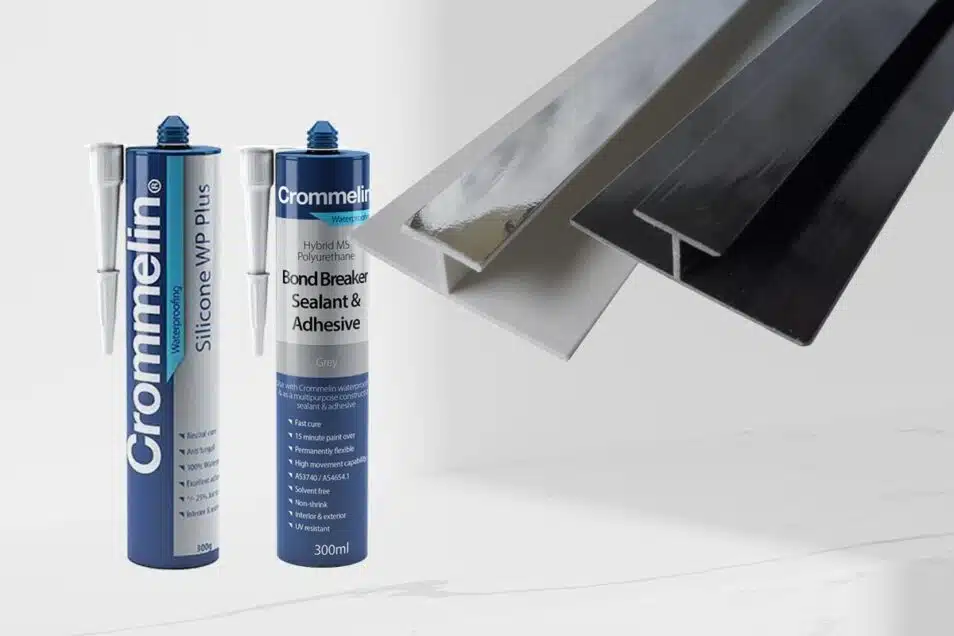
Featured Adhesives & Silicones
At Wet Wall Works, our adhesive and silicone selection is specifically curated to provide the perfect pairing for your wet wall panels.
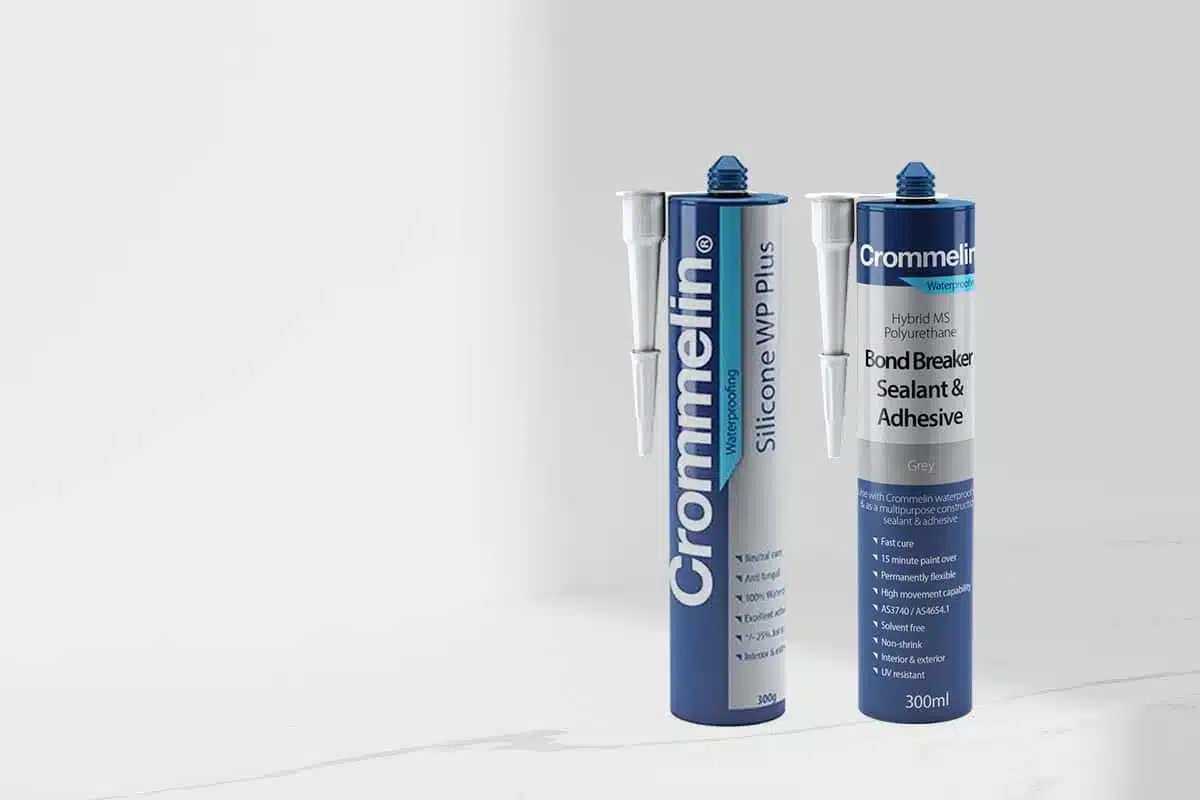
Crommelin® Hybrid MS Polyurethane Adhesive: This powerhouse adhesive is designed for bonding panels to various surfaces, offering unparalleled strength and flexibility. Its robust formulation ensures your panels stay securely in place, adapting to temperature changes without compromising its hold. Ideal for areas subjected to moisture, this adhesive is a reliable choice for ensuring long-term durability and performance.
Crommelin® Silicone WP Plus: For sealing joints and edges, there’s no better choice than Crommelin® Silicone WP Plus. Its exceptional waterproof properties make it a must-have for any wet area installation. Compatible with a wide range of panel materials, this silicone ensures a watertight seal, preventing moisture penetration and protecting your walls from water damage. Its ease of application and superior adhesion make it a favourite among professionals and DIY enthusiasts alike.
Tips for Effective Adhesive Application
When it comes to installing your wet wall panels, the devil is in the details—or, more accurately, in the adhesive. Preparing your surfaces properly can make the difference between a job well done and a do-over. Start by ensuring your walls are clean, dry, and free from dust or debris. A good cleaning, followed by a light sanding (for rough surfaces), sets the stage for success. Applying a primer can also enhance the adhesive’s bond, especially on porous surfaces.
Now, let’s talk adhesives. Crommelin® adhesives and silicones are your best mates here, designed to cope with the unique demands of wet areas. When applying, aim for a consistent bead along the panel’s edge or the area to be bonded. Avoid the temptation to skimp; a generous application ensures a watertight seal and strong bond, critical in damp environments. Remember, curing times vary, so patience is key. Allow the adhesive and silicone to set fully before exposing the area to moisture.
Installation Tips and Tricks
Achieving that seamless look with your wet wall panels and trims isn’t just about having the right tools; it’s about knowing the little tricks that make a big difference. First off, ensure all your measurements are spot on before cutting anything. A millimetre today can save a headache tomorrow. Use a spirit level to guarantee perfect alignment; visually pleasing results hinge on precision.
If you encounter any snags during trim or adhesive application, don’t panic. Common issues often have simple fixes. For instance, if a trim isn’t sitting flush, double-check for any obstructions or unevenness in the wall surface. Adjustments might be needed, but it’s all part of the process. And, if adhesive seeps out from under a panel or trim, quickly clean it up with a damp cloth for a neat finish.
Be sure to read our ‘Pro Tips for a Flawless Wet Wall Panel Installation: Avoiding Common Pitfalls‘ for further tips and tricks to ensure your installation is a success.
Maintaining Your Wet Wall Panels and Finishing Trims
Congratulations! Your wet wall panels are now a stunning part of your home! To keep them looking their best, a bit of TLC goes a long way. Regular cleaning with a soft, damp cloth and a mild detergent will help maintain their lustre and prevent grime build-up. Steer clear of abrasive cleaners or pads, as these can scratch or damage the surface.
It’s also wise to conduct periodic checks of the seals and edges, especially in high-moisture areas. Any signs of wear or lifting should be addressed promptly to prevent water ingress. Remember, a little upkeep maintains the integrity and beauty of your installation over time.
For more maintenance advice, read our blog post, ‘How to Clean and Maintain Wet Wall Panels for Longevity‘.
Conclusion
Throughout this guide, we’ve traversed the landscape of wet wall panel installations, focusing on the pivotal roles played by trims and adhesives. Our aim? To arm you, the savvy homeowner, with the know-how for achieving functional, aesthetically pleasing, and durable results. These aren’t just walls; they’re the backdrop to your daily life, and we’re here to ensure they stand up to the task— beautifully.
So, step into your next DIY project with confidence, backed by the insights and tips from this comprehensive guide. And remember, the team at Wet Wall Works is always on hand to offer personalised advice and support. Swing by our Gold Coast, Brisbane, Melbourne, and Perth locations to explore an extensive selection of trims, adhesives, and panels that will bring your vision to life. Here’s to a successful renovation and the many enjoyable moments it will host. Happy renovating!